SCCM Passive Site Server Configuration Step-By-Step Guide
High Availability for your SCCM!
Introduction
SCCM 1810 introduces the new “Passive Site Server” feature which allows us to have multiple site servers in which we can failover to in case of a disaster and to provide high availability.
Instead of having to perform a site recovery to get the
primary site system back after a rebuild we can now simply switch the passive
site server by promoting it to the primary site, as the passive site server
will be using the same database as your active site server.
This guide will provide a step-by-step breakdown and also prerequisites on how
to install, configure and failover to your primary site servers.
Prerequisites
Install Windows PE 1809
( Note: This needs to be performed on both Active and Passive site servers)
Due to the current releases of the latest ADK kits, 1903 is the latest for the Windows ADK and also latest Windows 10 release writing this guide.
ADK 1903 no longer contains Windows PE as an add-on, only on the 1809 version and previous releases so you will need to install the Windows PE 1809 first. Without this the prerequisite check will fail.
You can download the Windows ADK 1809 Win-PE here - https://go.microsoft.com/fwlink/?linkid=2087112
1.Double click the adksetup.exe
2. Select the features you want to add – Keep as default and click install to complete the installation
Install Windows ADK 1903
( Note: This needs to be performed on both Active and Passive site servers)
You can download the Windows ADK 1903 here - https://go.microsoft.com/fwlink/?linkid=2086042
1.Double click the adksetup.exe
2. Select the features you want to Add – Keep as default and click install to complete the installation
Remove Distribution Point Role
( Note: This needs to be performed on the Active Primary site.)
One of the prerequisites is to remove the distribution point role from the primary standalone site server. The reasoning for this is because the content library is controlled by the distribution point role and with this still installed you will be unable to relocate the content library to a network share, which is also another prerequisite for the passive site server.
1.Go to Administration – Site Configuration – Servers and Site System Roles
2.Highlight the Primary Site Server
3.Under site system roles right click the Distribution point role and click Remove Role
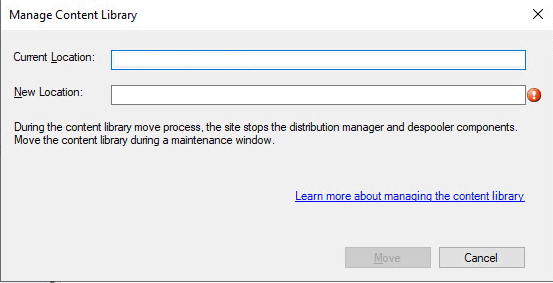
Move Content Library to File Share
Next we need to move the content library to a network file share in which both the Active and Passive roles can access.
( Note: If the Manage Content Library option is “greyed out” it will be because you haven’t removed the distribution point role)
1.Go to Administration – Site Configuration – Sites
2.In the home tab Click Site – Manage Content Library
3. Enter the remote location you will move the content library to and click next.4.In the summary tab give it a refresh and you will be able to see the percentage progress bar. You can also view the distmgr.log to view its progress in real time.
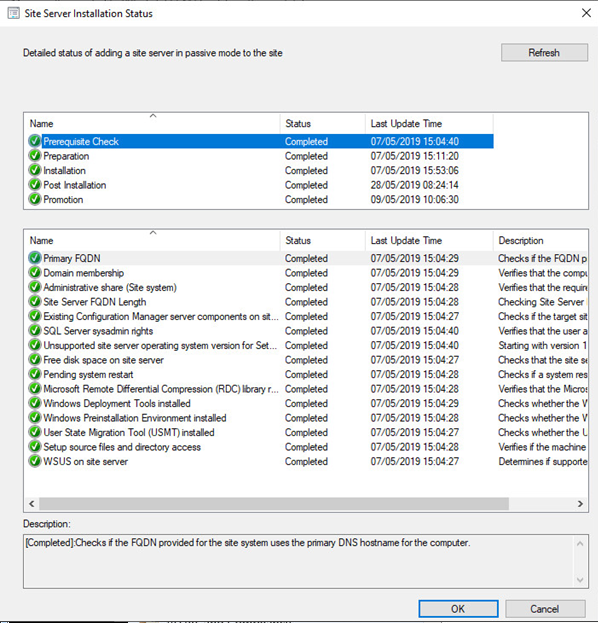
Adding Site Server in Passive Mode Role
1.Right click Servers and Site Server Roles and click Create Site System Server
2. General: Select a server to use as a system - Enter the FQDN of the server you are going to add this role to and enter the details of the account with enough permissions to do the installation for it.
3. Proxy: Specify Internet proxy server – Click next
4. System Role Selection: Specify roles for this server – Select the Site server in passive mode then click next
5. Site Server in Passive Mode : Specify the location of the Configuration Manager Installation source files and directory to use – Keep the default selected to copy the files over and add a directory to which the install will take place on the remote server.
6. Summary : The wizard will create a new site system server with the following settings – Click next to start.
7.Go to the Monitoring – Site Server Status to check the install. Clicking the Show Status button will display its progress.

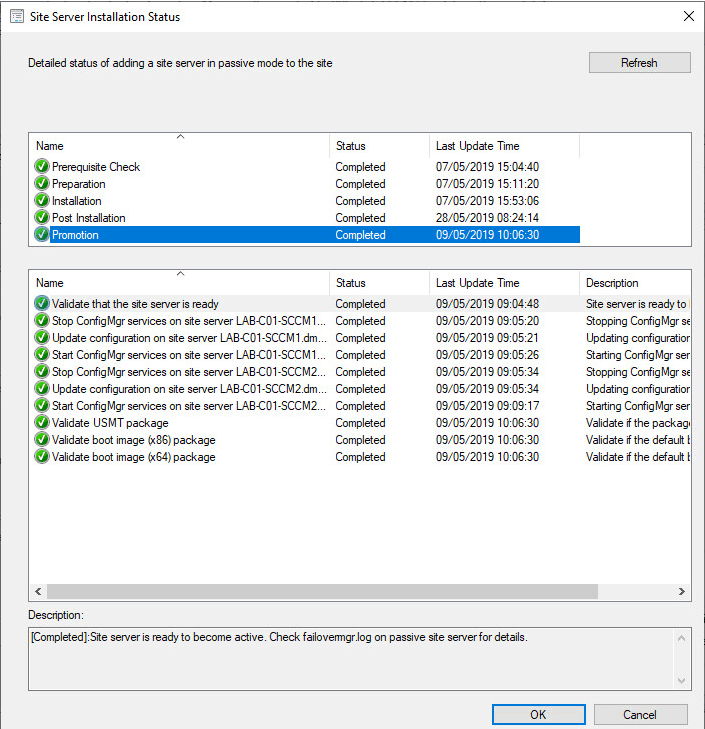
Failover to Passive Site Server
1.Open the Configuration Manager console
2.Go to Administration – Site Configuration – Sites
3.Click the Nodes tab below
4.Right click the Passive Site Server and choose Promote to Active
5.Check the Monitoring – Site Server Status and click Show Status on the newly promoted Site Server to see the progress of the actual failover.