SCOM - Management Pack Creator Official Version Released!
Build management packs in a matter of seconds!
Introduction
Back in 2015 i was working on various custom management packs which required a lot of bespoke settings and configurations which were required amongst various projects and took it perhaps as a challenge to see if there was a way of speeding up the process. Not necessarily just about the speed of the production, but also the overall quality of the produced management pack.
We find a lot of SCOM administrators and management pack developers tend to refer to our own created management packs and tailor around those which is great and in fact i do so myself, but what if you are in a situation in which you need to create something or add in addition in something you may not already had in your management pack to begin with?
Here is where i had developed the earlier versions of the POC called the SCOM Management Pack Creator.
A demo of this solution can be seen here https://scomathon.com/coffee-break/custom-mp-creation-with-powershell
Previous Releases
There have been various releases of this such as the ones below;
- SCOM Management Pack Creator V1.0 - https://www.walshamsolutions.com/scom-scom-management-pack-creation-script-v1-0
- SCOM Management Pack Creator V2.0 - https://www.walshamsolutions.com/scom-management-pack-creator-2-0-officially-released
- SCOM Management Pack Creator - PS Module Version - https://www.walshamsolutions.com/scom-management-pack-creator-ps-module-officially-released
Each of these had quite interesting in enhancements from growing from a wizard type of form into a full blown PowerShell Module in which you can import to run the functions manually. Now with greater enhancements and creating a bug/development list (see below) we have now been able to consolidate all the above into a bigger beast to present the official version.
Also have been fortunate to achieve over 2000+ downloads combined on these previous releases!
This Solution vs Management Pack Fragments
Management Pack fragments are brilliant ways in which you can take the XML code of a specific fragment which has been developed before in which the administrator can then replace with their own IDs & properties in which they need, and is also a great way of being able to then hold onto them when they become your next successful management pack which you can then model from.
Where the solution here is different is that what you find with fragments and your own management pack fragments, you are required to search and replace multiple IDs and this can be lengthy, especially when you have a lot of fragments, classes, IDs, references etc
Not to mention they are also case sensitive so that adds another level of complexity. Also bear in mind that base classes can be completely different which will have a knock on affect to class fragments and anywhere else which is referenced. So though this method is great to use you still need to have a fair on idea on how you will develop the management pack.
The solution i have here will not only create the MPX fragment but it will also use your IDs and base classes and build them straight away in a matter of seconds, a very similar mechanism you would see if you were to create a SCOM management pack from the Operations Manager console!
What Can you create with the Management Pack Creator?
See below all of the components you can create for the Management Pack;
- Create Classes - Create brand new classes which can use base classes or custom based classes depending on your management pack requirements.
- Create Properties for Classes - Create properties for your classes which attributes can be populated in conjunction with your discoveries. Ability to decide which ones will be a key property for your discovered instances.
- Create Run As Profiles - Create Run As Profiles which can be assigned to your discoveries, monitors or rules in which require accounts with the appropriate permissions to carry out monitoring actions for your classes.
- Create Relationships - When relating other classes to each other if using them as references for other fragments of your management pack, you can create a relationship fragment to join both together.
- Create Discoveries - Create various discovery methods for your classes. You can choose from PowerShell, WMI, VBScript or Registry. You can also create discoveries for ComputerGroups and InstanceGroups.
- Create Monitors - The ability to create monitors around Events, Performance, Services, Services in conjunction with performances and many more.
- Create Rules - The ability to create rules around Events, Performance and rules which use a PowerShell Script.
- Create Views - You can now create every view you need from State, Alerts, Performance, Overrides, URL and Events views.
- Create Folders - Create a folder for your management pack as well as subfolders in which you can nest underneath the parent folder and also place your views into.
- Create PowerShell based Monitor - The ability to create a custom module which is based on using PowerShell where you can create a monitor with any condition you choose based on the PowerShell script you write.
- Create Diagnostic Tasks - Create diagnostic tasks for your monitors to run under a specific severity to analyse more information on the health issue.
- Create Recovery Tasks - Create recovery tasks for your monitors to run under a specific severity to help automatically resolve the issue with your monitored instance.
- Create Console & Agent Tasks - Create Console & Agent tasks which are applicable only to your monitored instances relating to the class which you have created in your management pack.
- Create Knowledge Articles for each components - You now have the ability to add knowledge articles to your fragments whether that be discoveries, monitors, rules etc
New Features
During the transition to the official release of this solution, new features and additions have been made along the way.
Below are a handful of brand new features to help enhance this solution.
- Create-PowerShellScriptDiscovery Function - A new function has been added which allows you to create an all purpose PowerShell Script best fitted for an actual discovery.
- Add additional Registry discoveries - A new function has been added called Add-SCOMMPRegistryKey which allows easier creation of the Registry discovery method to attach each property to an appropriate setting and mapping,
- Add Function for WMI Discovery for adding Properties -A new function has been added called Add-SCOMMPWMIProperty which allows easier creation of the Registry discovery method to attach each property to an appropriate setting and mapping,
- Add Linux/UNIX support - There is basic support to create monitors, rules, discoveries and also agent tasks for your UNIX/Linux estate. Note you will need the Unix Authoring MP which the link is available in the downloadable instruction guide.
Power of the Get-SCOMClassID function
I have spoken of this in the past when i released the 3.0 version but have to re-iterate its powers!
The power of this function is with in conjunction to completing management pack builds on different functions which accept a pipeline and also accept a parameter with pipeline property name.
For example this command has switches to obtain the following;
- File which contains the Classes
- File which contains the folder classes
- File which contains the Monitors and Rules

Once you have worked on the intellisense you can then pipeline into a command like specified below.

Note that this doesn't work with variables this will only work when you specify the entire path (quotes, no quotes or spaces) then the intellisense will kick in.
Bugs Fixed
With the previous versions being very well received there have been many bugs which have been meaning to be fixed and rectified in order to provide a smoother and cleaner management pack building process.
Though this solution is used to provide flexibility as well as provide quality of building a custom management pack with speed, certain bugs can impact the speed and quality of the product as well as spending unnecessary time in trying to troubleshoot and look for reasons why your management pack cannot be built correctly.
Or even worse when imported into SCOM to find certain issues in various parts of the modules. Below is a list of bugs which have been corrected.
- Get-SCOMClassID now takes file paths with quotes or spaces
- Properties in Discovery should have new lines rather than same line
- No longer Depends on MPMonitorRuleFile if wanting to use Get-SCOMClassID when in junction with creating views
- MPElement is missing from PowerShell Scripts now fixed
- Quotation marks on PowerShell scripts need to start from MPElement and end at first $
- Change SeverityList and Severity switches in views as comments to avoid setting wrong settings
- Change MaintenanceMode switches in views as comments to avoid setting wrong settings
- Registry Discovery Datasource uses Windows.ComputerRole instead of Windows.Computer
- Modify Add-SCOMMPRegistry function where if PathType is 0 then AttributeType cannot be used
- MPElement missing from additonal registry keys added
- Computer Role user in Datasource for Registry should just be computer
- HKLM needs to be removed from paths
- Param line on PowerShell script for custom module needs to be removed
- ComputerName parameter should be removed from Performance Monitor function
Where to Download
The Management Pack Creator solution can be found in the following link below.
https://irp-cdn.multiscreensite.com/c1f89e50/files/uploaded/SCOM%20Management%20Pack%20Creator%20-%2...
Instruction Guide
You can also download the instruction guide which also gives full reference to every function in which the module has in the same link below
https://irp-cdn.multiscreensite.com/c1f89e50/files/uploaded/SCOM%20Management%20Pack%20Creator%20-%2....
How to run the solution
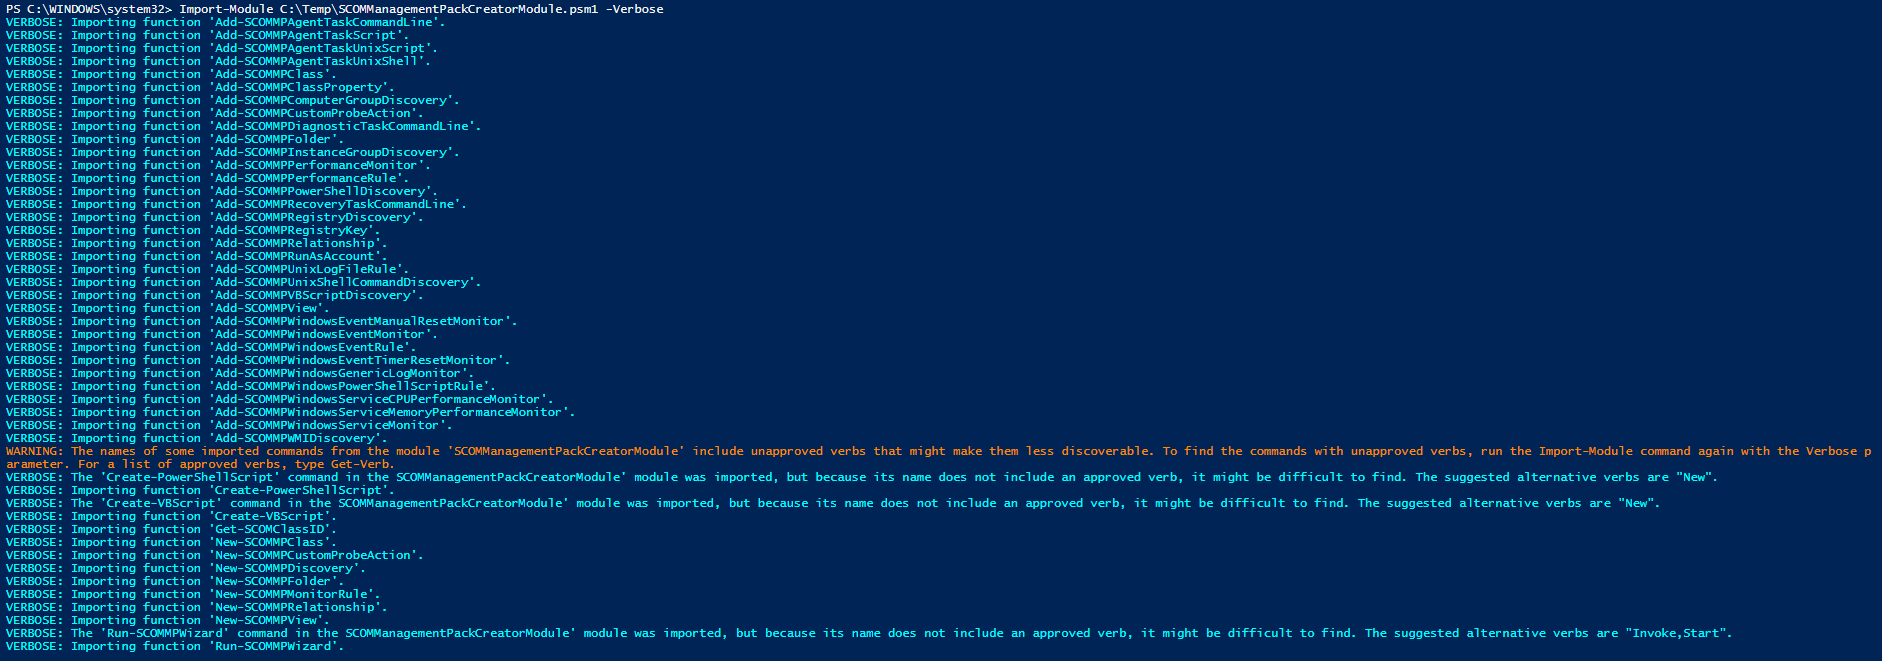
The solution is of a PowerShell Module which can be imported.
In order for this to be working perform the following;
- Download the solution
- Unzip to a location which you have enough administrative rights
- Open either PowerShell or PowerShell ISE depending on which one you will be using to build your management pack.
- Run " Import-Module .\SCOMManagementPackCreatorModule.psm1 -Verbose "
How to Create Management Pack Project in Visual Studios
You will require two pieces of software before you can do this;
- Visual Studios (Currently Using 2019)
- VSAE Authoring Extensions - Latest download here - https://www.microsoft.com/en-gb/download/details.aspx?id=30169
To create a Management Pack project perform the following
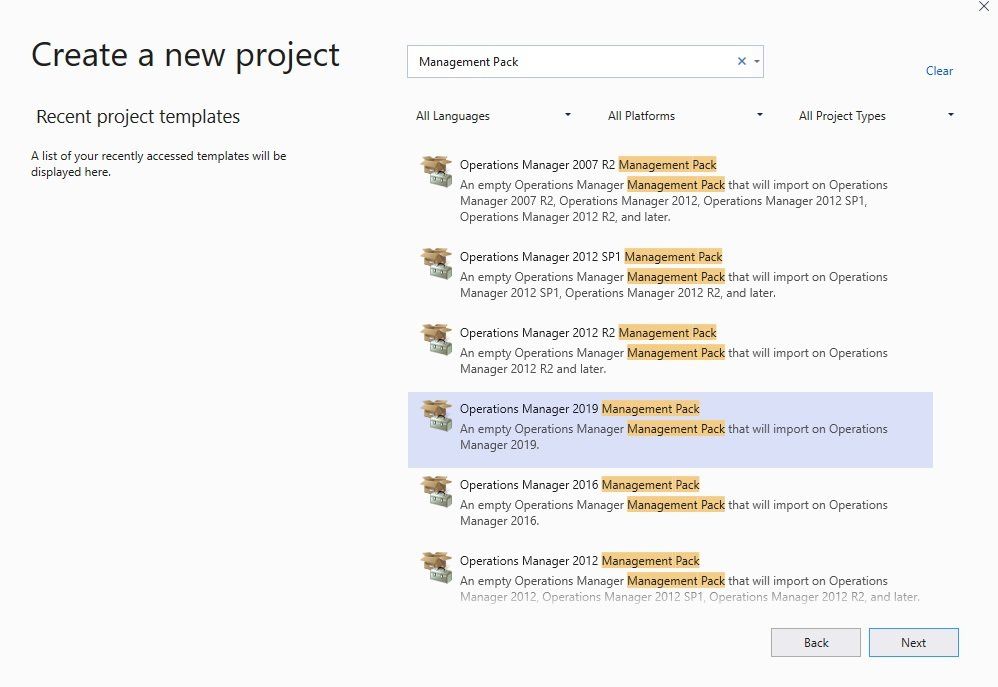
- Open Visual Studios
- Click Create a new project
- Type Management Pack in the search engine to find the Operations Manager listings. Select the version which is applicable to your environment.
- Enter a name for your Management Pack and then click create
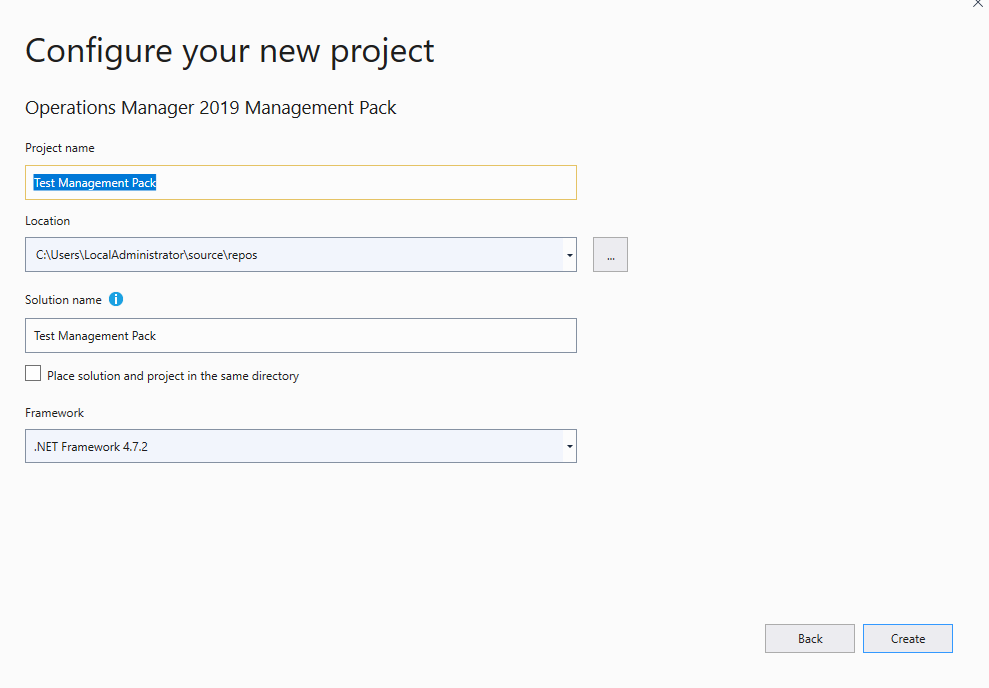
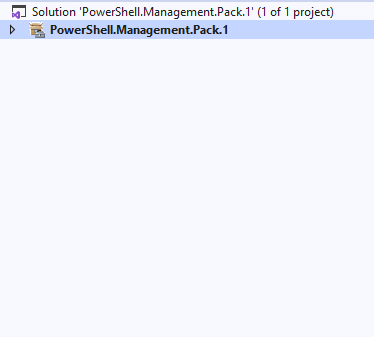
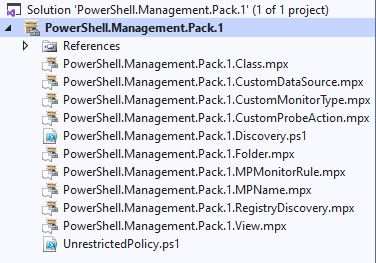
Once created you should then end up with the screen below
How to Build a Management Pack
Once the module is imported you can then use the other PowerShell Script which comes along with it which is the SCOM Management Pack form.
It contains all of the functions needed and required to build your SCOM management pack in which you can then replace the values on the switches to build the management pack you require.
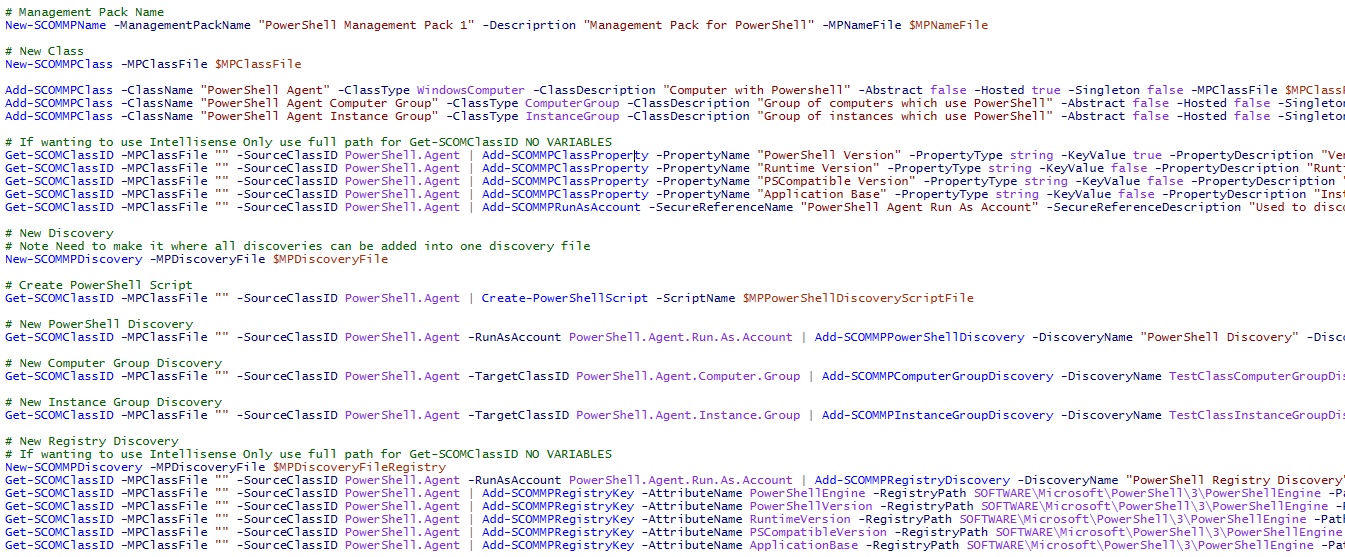
Below is a screenshot of what the form looks like.

The first values you see are variables which create all of the fragment MPX files required for your management pack. As you can see in the example there are already two variables filled out for the Management Pack Name file and Class file.
Below are the lines for every single function required to build out your entire management whether you intend to use all of them or most of them you can look through them.
There are values pre-filled to give you an example of what to put down to create your fragments.
Few things you should know about this process for full completeness of understanding;
- The switch that asks for Name like " ClassName " can be written as a friendly name with spaces as the solution creates the ID with the same answer but with dots replacing the spaces. For example i used " PowerShell Agent " as my class name. But the ID will be formatted as " PowerShell.Agent "
- Any lines which use " Get-SCOMClassID " enter a full file path for your class file, then delete the prefilled value on the " SourceClassID " or " TargetClassID " switches and the intellisense will work to pick up your IDs.
If there are any lines, functions you don't require for your management pack then simply put a "#" next to the line so it doesn't get action-ed during the script.

Once you have configured all the properties and configuration you require you can either execute the entire script, or you can stagger it line by line if you are looking to see the process develop piece where you can observe changes in the MPX files etc
From here you can now update the script with the location of your Management Pack project which normally resides in the source\repo
location of your user profile i.e. C:\Users\Administrator\Source\Repo\Test management Pack
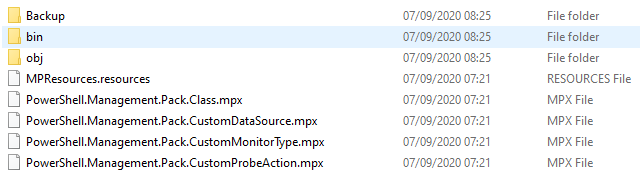
When you run the script you should then see MPX files get created in these locations as seen below.
You can then right click the project folder in Visual Studios and then select to import and then select the MPX file so that it is now part of your Management Pack Project.
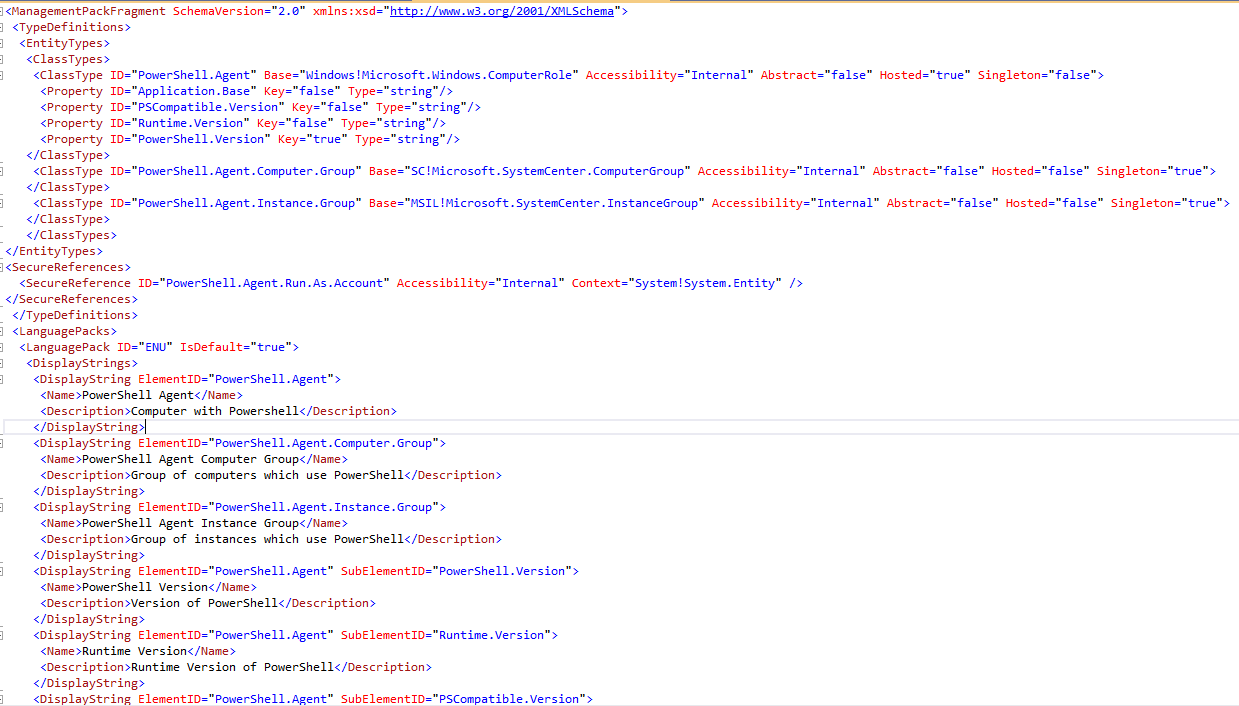
Whether you run the script before or after this you should see XML code populated, if running after you will see the XML code appear in real-time as seen below.
When finished with the management pack select the Build - Build Solution option in the toolbar above.


Sealing your Management Pack
Another cool thing we all want to do is to be able to seal our management packs so they end up as a .mp extension as opposed to an unsealed .xml extension.
To do this you need to open up the developer command prompt for visual studios
which should be located in your Visual Studios folder in the start menu or installation folder.
Then run the following command
sn.exe -k C:\Key\MPKey.snk
Once created you can then go to the properties of your management pack project and select the build tab and where it displays a box for your encryption key point to the location where you created the key earlier and select it.
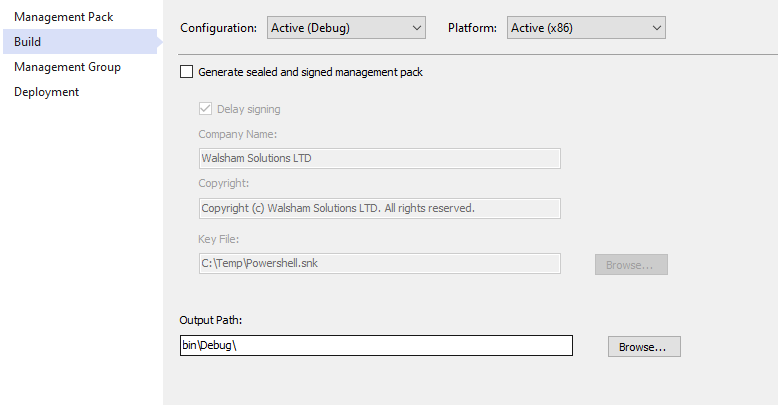
Now when you build your management pack it should now create a .mp management pack in the Bin\Debug folder of your project repository.


Troubleshooting
Errors Building due to references
The solution will have disclaimers when building specific fragments to warn you of any references which you may require.
But just in case we will cover it in this section.
Say for example you want to create an InstanceGroup within your class, if you try to build you may perhaps experience an error such as this.

If you see this, it's due to a missing reference management pack which is required. Luckily when you install the VSAE authoring extensions it creates a folder which contains all of the management packs which you may need for this and has them categorised depending on the version of SCOM that you are using.
The best way around this is to perform the following;
- Right click your Visual Studios Project References folder underneath your project name
- Select Add Reference.
- Go to C:\Program Files (x86)\System Center Visual Studio Authoring Extensions\References\OM2019
- Select the Management Pack reference you need (in this case its the Microsoft.SystemCenter.InstanceGroup.Library.mp)
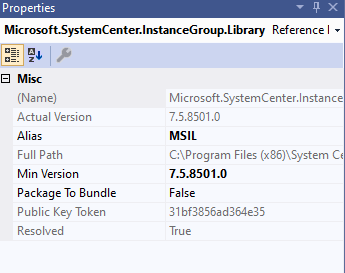
- Once this is imported click on the Management pack.
- Observe the field which says Alias, as this has to match the first part of your base class that is being used on your InstanceGroup Class i.e. The Alias is MSIL, and the Base Class is using MSIL!

Intellisense not Working on the Get-SCOMClassID
You will need to specify the entire path so that when using switches such as
- MPClassFile
- MPFolderFile
- MPMonitorRuleFile
From there when you use
- SourceClassID
- TargetClassID